Our daughter turned one on July 25, 2021, and I wanted to do a smash cake photo shoot for her. We did not get any professional images done as a newborn so I thought this would be a great opportunity to capture some semi-professional shots of her.
Smash cake photo shoots have become very popular over the years and can range in cost between $100 and $500 with an average price of $375. Packages and pricing depend on the photographer, your location, props for the shoot, outfit changes, and if photographers allow other members of the family like parents or siblings. With my experience as a photographer, not professional in the slightest, I decided I wanted to do her photos myself in our home. Not only would this save us money, but I was able to get as creative as I wanted, without worrying about time and additional fees.
Below are a few tips and tricks on how to DIY a smash cake photoshoot for less than $25.
Cost Breakdown
As I mentioned above, I wanted to do something nice to capture this milestone, but I was also on a budget. With 30 days before the party, I needed to get creative. So I used many things that I already had laying around the house and only really needed to get the cake ingredients and a few decorations to jazz up the shoot.
I chose to get all of my supplies from the Dollar Tree. If you aren’t familiar, Dollar Tree is a store where everything is $1! EVERYTHING! Here is a list of the things I bought there:
- Balloons
- Boxed Cake
- Cake Icing
- Sprinkles
- #1 Candle
- Flower Decor for Cake
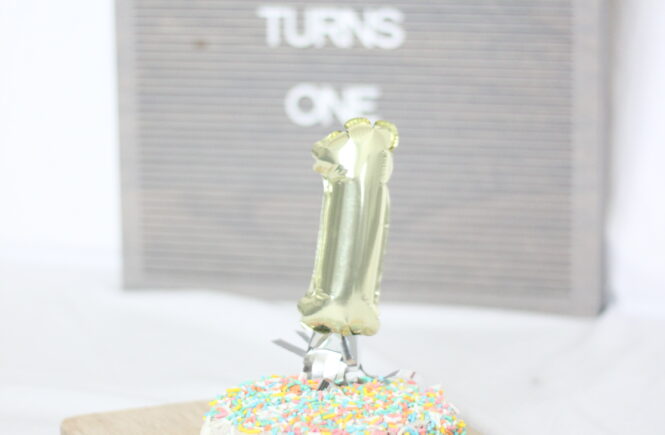
I did stop by Walmart looking for a few more decorations, but I only ended up purchasing the gold #1 cake topper and a 6″ cake pan for the actual cake. The topper was about $3 and the cake pan was around $5.
Decide on a theme
If you don’t already have a birthday party theme picked out use google images and Pinterest to find themes you enjoy. I wanted a theme where I could use things we already had at home. I decided on rainbow confetti with gold accents. The theme of your shoot does not have to match the theme of the party, but you can use outfits, printed images, or colored balloons to compliment the shoot to the party’s theme especially if you plan to use these images throughout the party as we did.
Creating the Cake
There are so many cake options available it’s a bit overwhelming! You want your cake to match the theme you’ve chosen and look beautiful for pictures. I used Pinterest and YouTube for this step. I’m not a baker and wanted to learn how to do a semi-naked smash cake. If you look at the images below, you can see that the semi-naked cake I was going for did not work out.
I did many hours of research and my cake still turned out decent. It wasn’t the best thing, but it did what it needed to do. I followed the baking instructions on my cake box, iced the cake, and added some sprinkles for decoration.
Setting up the photoshoot
Using what we already had here at home, the easiest photo set I could think of involved a white sheet, painter’s tape, and a large canvas we had laying around. The canvas served as the backdrop and prop for the sheet to drape over. I used painter’s tape to keep the sheet from moving on the ground, and the sheet acted as the pure white background space you would see in a professional studio.
My advice with using a sheet would be to iron it or pull it tight on each side, taping it down to prevent wrinkles.
I set this up in front of a large window in our “flex room” or formal dining room to use the natural light. This prevented needing to purchase lighting for this shoot or having to go outside dealing with nature.
Optional Props
Make your shoot fun by using props! We used balloons, a chopping board, a letter board with a cute message, #1 candles and cake toppers, and gold confetti. The confetti ended up being that crinkly packing material that I recycled from a gift that was sent to my sister. You can use whatever props you like.
Editing Images
I chose to edit the pictures using Adobe Photoshop since we already have a subscription, but there are MANY free apps and programs that you can use to make your photos look professionally done.
Play with lighting, airbrushing, and filters. Since this is DIY you can jazz up or be as minimal as you prefer in your edits.
You can also leave them raw for a vintage look and feel.


Let me know in the comments if you decide to use some of these tips to create a smash cake photoshoot or any photoshoot for your child in your home.
